Tuesday, January 7, 2014

Creating my first Speed Drawing

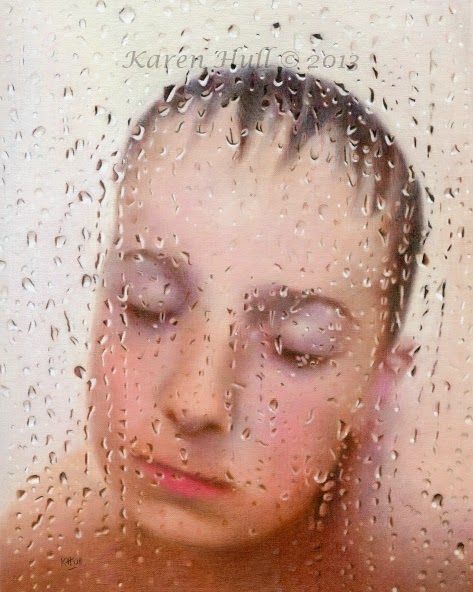
Window to my Soul
5x7 inches
Coloured pencil & Markers on Watercolour Canvas

My set up for the speed drawing
I had several goals for 2014 - one was to be a more diligent blogger and the other was to create my first speed drawing and hopefully a course of them over the next year - here we are one week into the year, and we have a promising start. I posted my first speed drawing to YouTube this morning and what a wonderful feeling it was (you can view it here http://youtu.be/8zDfl8XIbbI). It isn't the best quality speed drawing but it was a wonderful learning experience.
For those of you who, like me, are keen to try your hand at speed drawing and time lapse photography, but who don't want to spend a fortune on expensive equipment or buy confusing video editing software, I thought I would share my setup and experiences. I first downloaded an app called Lapseit from iTunes for my iPhone - this app is also available for Android phones. You can get the free version, or for $1.99, buy the premium version, which has a few more features and this was the version I purchased. This wonderful little app is very simple to use and I thought did quite a good job at capturing the time lapse video. It also renders the video for you, once you have completed your drawing, without the need for complex editing. I did discover that it renders MUCH more quickly if you render your video without the added option of applying music. I also found that unless you add your own music, it is easier to allow for monetization (making money from adds on your video) if you don't have music added.
It wasn't all smooth sailing though. For some reason, unbeknownst to me, the app cut out a couple of times during filming, leaving me with some gaps in the footage. I'm not sure if this was the app or my iPhone playing up. I then temporarily changed the settings on the iPhone and put automatic lock to 'never' and 'automatic brightness' off and am hoping in the future that this helps to stop the app shutting down.
I initially set the time interval for each image at one image per 10 seconds and later discovered that this really is too long, making for a video that was much quicker than I really wanted, but I wanted to first see how much data creating the video would use up. I needn't have worried. I worked on the image for about 5 hours yesterday, and after all that time had only 50 seconds of footage with a file size of about 50Mb. About three quarters of the way through the artwork, I changed the interval to one image every 5 seconds which gave a much better result. They say the average attention span of a YouTube viewer is about 2-3 minutes which is what I will be aiming for in the future. The video was rendered at 25 frames per second.
Apart from purchasing the app for the iPhone, I needed to find a way of getting the iPhone in the correct position, so that it has a good view of the artwork, without being obtrusive as I worked (you can see it in the image above). I picked up this flexible mobile phone stand on Ebay for about $25, and it is perfect for the job.
I may look at some of the other time lapse apps available on iTunes, but overall, I would highly recommend this app and setup for anyone just starting out in timelapse photography who isn't needing an Academy Award winning video :)

Sunday, December 8, 2013

Last artwork for 2013 and Season's Greetings

Bunny Banquet
12x17 inches
Coloured pencil and ink on Fabriano Artistico Paper
This will be my last artwork for 2013 as I pack up my 'studio' in readiness for Christmas and the arrival of lot's of interstate family. Sadly, my poor blog has been neglected this year as many other commitments have kept me away from blogging. My goal for 2014 is to post more blog posts, more WIP's and hopefully some Speed Drawing videos (once I spend the holidays working out how to do it). I wish you all a very safe and Happy Christmas and holiday season and look forward to sharing more art and news in 2014 :)

Wednesday, October 23, 2013

Refuge

Refuge
8x10 inces
Coloured pencils and zest-it with white ink
 highlights on Watercolour Canvas

As we are currently surrounded by so many bush fires, this is a reflection on the comfort, protection and salvation that water brings to those caught up in the heat, smoke and ash of the fires, and is dedicated to all those wonderful fire fighters who put themselves out there to protect the property and lives of others. May all those caught up in the fires stay safe and be given strength.

Wednesday, October 16, 2013

More Coloured Pencil works on Canvas

Jersey in the Cover
5x7 inches
Coloured pencil on Linen Mat board

The Curious Visitor
9x12 inches
Coloured pencils, Inktense pencils and white ink on watercolour canvas
(Black background painted with Jo Sonja's Background colours in Charcoal)

Falling behind again on my blogging - I do so wish there were more hours in a day!!! Here are just a few of the things I've been working on lately. I am so loving working with coloured pencils on canvas, whether it be watercolour canvas, as in The Curious Visitor or linen mat board as for Jersey in the Clover. Because I am so heavy handed with my pencil work, I have always found it a little dissatisfying working on regular papers, and so am constantly on the lookout for surfaces that allow both layering and blending and still provide the ability to do fine detail. I find the canvas surfaces perfect for this. The finished result is something more akin to a painting than a drawing and can be varnished and hung without glass. Watercolour canvas has a softer feel to it than traditional gessoed canvas surfaces and also takes the inktense pencils beautifully and allows for exciting possibilities when using other media with coloured pencils such as watercolours and ink. In my previous post, I shared a mini tutorial on working with coloured pencils on canvas and now you can try a more advanced piece with this latest 26 page tutorial.

Wednesday, September 25, 2013

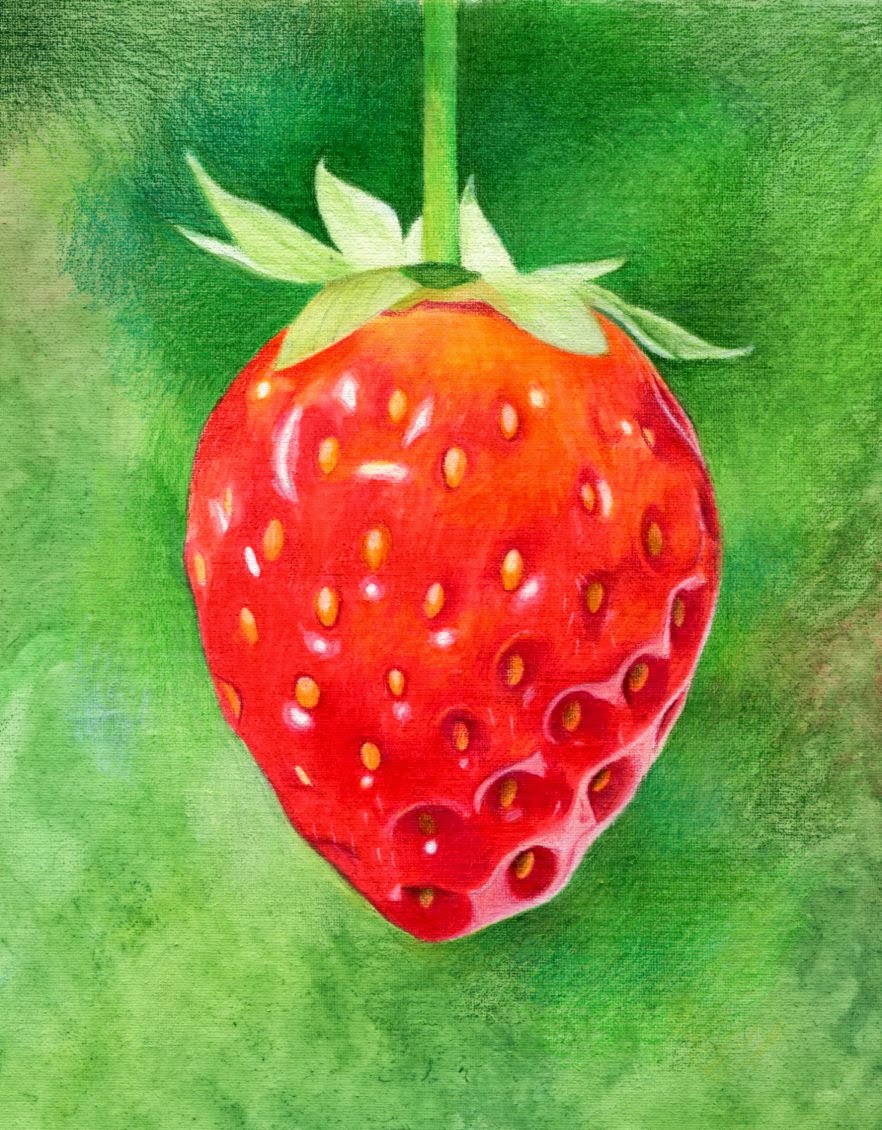
Perfect Picking - Mini Tutorial - working with Inktense and Coloured pencil on Canvas

Perfect Picking - 5x7 inches
Drawn with Derwent Inktense and
 Coloured pencil on Watercolour Canvas

Reference Photo

Transfer of image
Draw your outline and transfer your drawing to canvas using your favourite method of transfer. The canvas I used was Renoir Watercolour Canvas Panel, which has a very fine weave and is similar to Fredrix Watercolour canvas. You can use any fine weave canvas of your choice and still get similar results.

Dry Derwent Inktense Pencils
Inktense Pencils used dry. Colours used for the Strawberry include Cadmium Orange, Scarlet Pink, Tangerine, Poppy Red and Cherry. The little strawberry pips were coloured with Sicilian Yellow. The strawberry leaves were given a very light application of Spring Green and the Background was done using a combination of Spring Green, Hooker's Green, Beech Green, Iris Blue and Scarlet Pink.

Water added to Inktense Pencils
This is the same image after water has been applied to the Inktense pencils. An 0 and 3 brush were used for the strawberry and an old rough flat brush was used to stipple the background.

Colouring with Coloured Pencils
Here you can see we have started to colour the background and strawberry using coloured pencils. Colours used on the background include Faber Castell colours Chrome Oxide Green Fiery, Permanent Green Olive, Permanent Green, Apple Green, Olive Green, Pine Green, True Green, Grass Green and Light Green. Faber Castell Colours used on the strawberry include Cream, Cadmium Yellow and Light Ochre, Dark Chrome Yellow for the 'seeds', Cadmium Orange, Dark Flesh, Vermillion, Deep Scarlet Red, Pale Geranium Lake, and Light Carmine for the red strawberry. Madder and Purple (also known as Red Violet) were used for the darker recesses around the seeds. Light Flesh was used for the pink highlights.

Blending and Burnishing with Caran D'ache Pablos
In this image, the leaves of the strawberry have been coloured using Faber Castell colours Apple Green, Light green, Light Ochre, Walnut Brown and Brown Ochre. At this point all areas are then blended and burnished using the softer Caran D'ache Pablos. Colours used on the background include Grass Green, Light Olive, Olive Black, Khaki Green, Light Green, Spring Green, Light Ochre, Bluish Pale and Pale Yellow. Caran D'ache colours used on the strawberry include Ruby Red, Carmine, Apricot and Salmon Pink for the pink highlights. The leaves were burnished using Light Olive, Spring Green and Pale Yellow.

Adding detail with white ink
In this final image, I used some Art Spectrum Concetrated artist's ink in white to add little hairs around the strawberry, to give definition to existing white highlights and add further tiny ones. If you enjoyed this mini tutorial, please visit http://www.miniatureartbykhull.com/tutorials_36.html to find a list of more comprehensive tutorials.

Monday, September 9, 2013

Newsletter Launch

I often get asked by artists to let them know when knew drawing tutorials are released and also for hints and tips for working with coloured pencils. Over, the weekend, whilst at our youngest son's soccer breakup, it suddenly occurred to me that a newsletter would provide the perfect way of keeping everyone up to date. I spent much of the weekend compiling an email distribution list and putting together this first, short newsletter. I am hoping to make them a little longer and more informative in the future, but just wanted to put the feelers out for this first one. If you would like to be added to the email list, you can either send me an email, or message me via Facebook with you email address. I am planning to make this a monthly issue and would love to hear if you have any ideas for tutorials or questions you think everyone might like to know about. Happy drawing. :)

Friday, September 6, 2013

Pippa - Coloured Pencils on Black Mat Board

Pippa
8x11 inches
Coloured pencil on Black Mat Board

This gorgeous little girl is called Pippa and I have drawn her a few times. She is the daughter of my artist friend Andrea Knowles, who kindly allowed me to use this reference photo again to create a drawing tutorial. I have had a bit of a passion for drawing on black surfaces and quite a few artists have asked me about skin tones when drawing on black. This 27 page tutorial is available from my website at http://www.miniatureartbykhull.com/tutorials_36.html. I have done it predominantly using Caran D'ache Pablos and Faber Castell Polychromos. The Caran D'ache are more vibrant on the black support, but do tend to sit on the surface and leave more dust, and the Polychromos are wonderful for pushing the Pablo pigment into the black surface to give a smoother, more polished look :)